Heat pumps, like any complex system need a little care to keep them running as efficiently as possible. The majority of issues with underperformance can attributed to a lack of pro-active maintenance so it is really important to follow some basic steps as outlined in your client information pack (assuming we installed the heat pump for you).
The first thing to keep an eye on are the filters installed on the system. The filters catch any tiny bits of stuff floating round the wet system on either the heat collector side or the heating distribution side of the system. The filters are incorporated into valves called filter ball valves. They allow you to clean the filters without having to undo any of the plumbing.
Cleaning a filter ball valve the easy way
Step 1 – turn off your heat pump
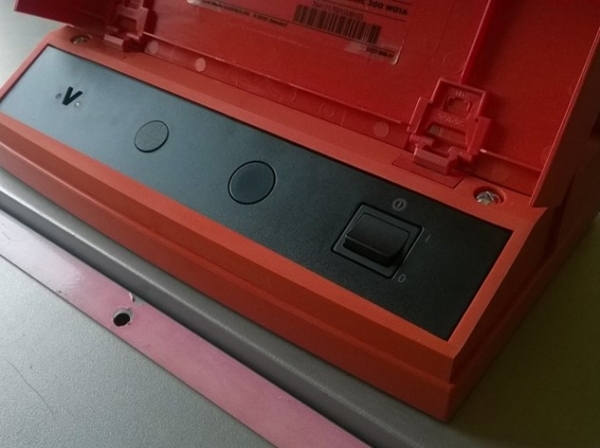
 To avoid system damage, it is important you turn off your heat pump before conducting any maintenance on it. If the heat pump is running when you turn the filter ball valve to the off position, the heat pump may sense something is wrong and go into alarm mode to protect itself. So check in your user manual for how to turn it off before proceeding to step 2. You might also want to put an ice-cream tub or similar under the filter ball valve to catch any drips whilst cleaning.
Step 2 – turn the filter ball valve to the off position
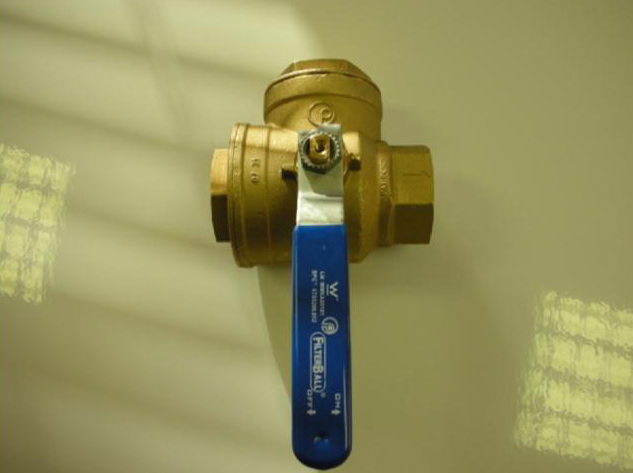 Each filter ball valve has a handle which must be turned to the off position like this to ensure the valve is sealed before opening.
Step 3 – loosen the filter plug
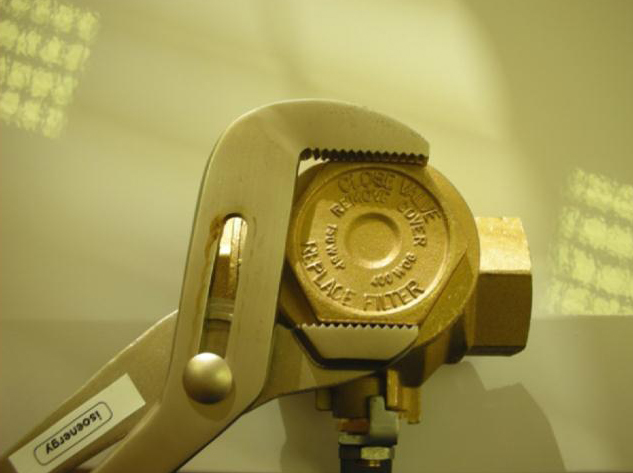 Using the pair of adjustable pliers in your client handover pack, undo the inspection plug as shown. It is normal for a small quantity of fluid to leak out of the valve at this point.
Step 4 – remove the plug
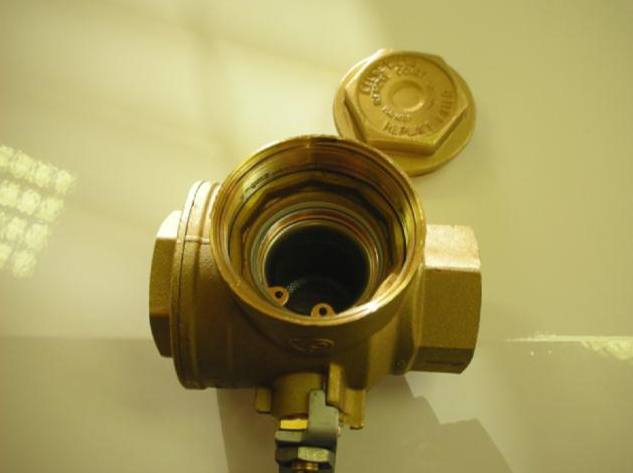 Remove the plug to reveal the filter inside. If you cannot see the filter cage, the valve is not in the off position! Replace the plug and go back to step 2 and start again. Turning the valve off whilst the inspection plug is removed will result in you getting wet and may require a service call out to refill the system.
Step 5 – remove the filter cage circular clip
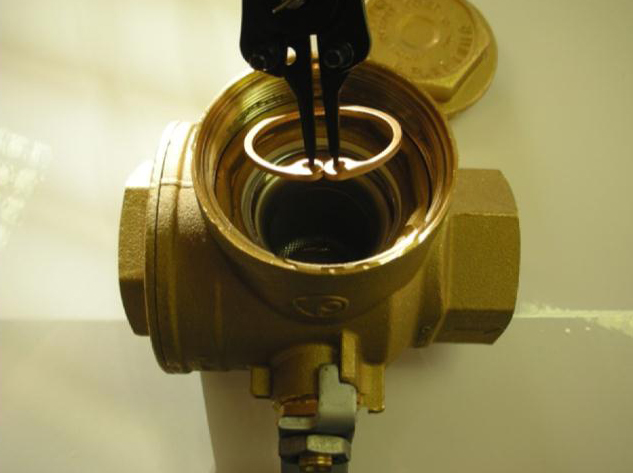 Using the circular clip pliers supplied with your handover pack, gently push each tine of the plier into the brass holes on the circular clip as shown. Squeeze the pliers together and remove the circular clip. Be careful the circular clip doesn’t ping off across the room at this point.
Step 6 – remove and clean the filter cage
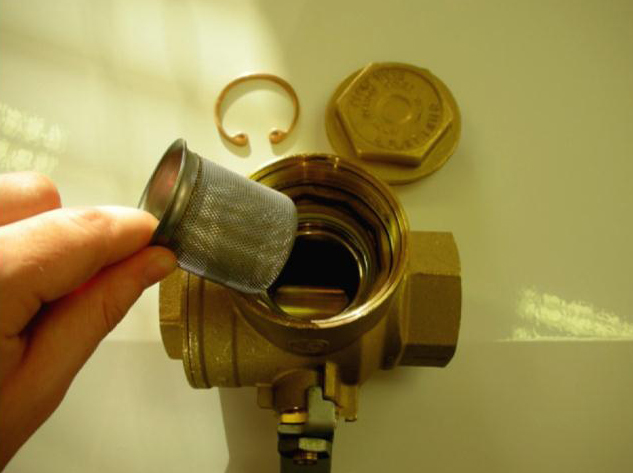 Pull out the filter cage by using your fingertips. You can then clean the filter under a running tap. Use an old tooth brush to gently clear any blockages. Be careful not to distort the cage as it is quite fragile.
Step 7 – replace the filter cage and circular clip
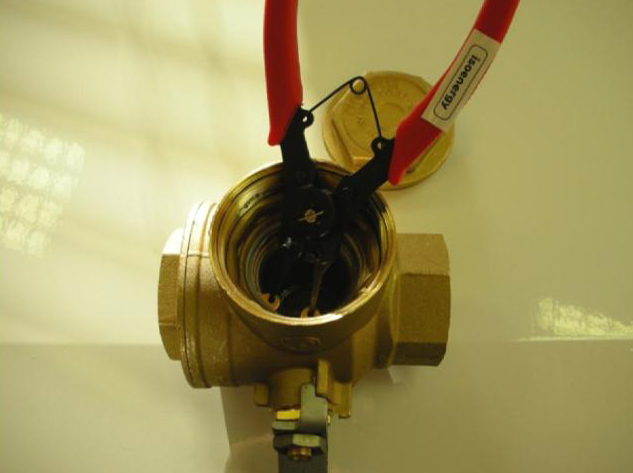 Replace the filter cage in its housing making sure it is all the way in. You can now replace the circular clip using the same technique detailed in step 5. You will know when the clip is secure as it disappears into a recess in the valve housing.
Step 8 – replace the valve inspection plug
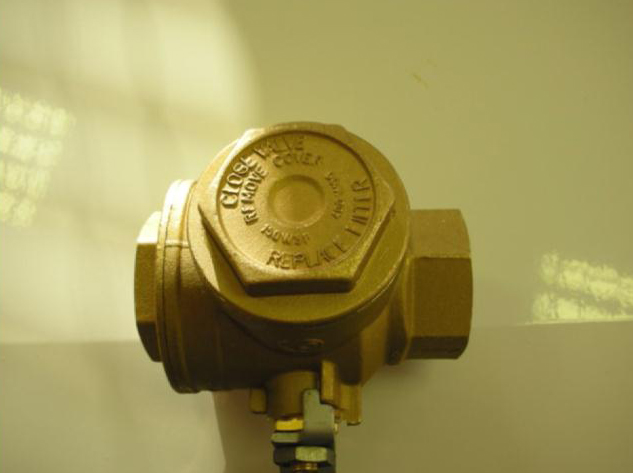 Finally, you can tighten the inspection plug with the adjustable spanner and turn the valve back to the on position. Once the valve is back on, you can check to make sure there are no leaks from the inspection plug.
When all of the filter ball valves have been cleaned and checked, the heat pump can be switched back on finishing the process.